Monday, March 28, 2011

DIY - ruffled t-shirt in 9 steps!


1. Take a large T-shirt and lay it down flat.
2. Fold the T-shirt in half lengthwise and mark the front, center with a pin on the collar.
3. Pinch a fold in the center of the shirt, about 1 inch deep creating a pleat. Pin the pleat vertically (from the collar to the hemline) so that it stays in place.
4. Repeat until you have 4 pleats in the front, center of the t-shirt.
5. Starting from the bottom hem of the T-shirt, sew a horizontal line from right to left, sewing over the pleats so that they are facing the left.
6. Four inches above that line, sew another horizontal line, this time from left to right, sewing the pleats down so that they are facing the right.
7. Repeat the horizontal lines until reaching the collar of the shirt.
8. Okay…almost done! Now, using a zigzag stitch sew two large “S” shapes, starting from the collar, down to the hemline, feeding the t-shirt fabric into the stitches to create tiny gathered pleats into the stitches.
9. Now, if you like the look of this top as a tank, cut off the sleeves around the sleeve hemline to get this edgy look.


- Tutorial from www.supernaturale.com

Thursday, March 24, 2011

70's flowers

After my daughter turned in her 1970's fashion poster, she inspired me to get dig through my fabric scraps and make a few 70's-style fabric flowers.

I cut three flowers shapes out and sewed them together for each flower. Simple.

They kind of look like polyester butterflies.

Maybe I'll make them into pins? Put them on our jackets (yes, we are still wearing jackets in Ohio) and pretend it's Springtime. ;-)

Tuesday, March 22, 2011

Sweet, Simple Spring Skirt for Girly Girls!


Please visit Debbie's blog to view the complete tutorial. I've included her instructions below:
http://squigglytwigs.blogspot.com/2010/08/tuesdays-tute-sweet-and-simple-skirt.html


Materials:

Measuring Tape
Fabric-Do measurements and calculations before buying fabric.
Elastic-Enough 3/4" non-roll elastic to around the waist of the wearer.
Thread and sewing supplies
Large paper (optional)-if you want to create a paper pattern to make future skirts quicker.
Directions:

Measure Wearer:
1.Waist:________
2.Hip: __________
3.Length of skirt (outseam):_______ How much of this do you want to be the ruffle?:_______

Work the formula:
1. Skirt: hip + 4 X 1.5 (A-line like) or X 2 (more fullness)=___A_________ (or you can measure the bottom of a favorite dress or skirt and use that measurement for A)
2. Completed length – ruffle + 2" for casing and seam = ___B________
3. Ruffle: A x 1.5= __C_________
4. Ruffle length + 1” for seam and hem = ____D_________
You will want to write down these numbers for future use, or make a paper pattern.

Cut Skirt Pieces:
You need to cut a rectangle(s) of fabric that is A (wide) by B (long).
Cut Ruffle Pieces:
And cut a rectangle(s) of fabric that is C (wide) by D (long).
Pay attention that any directional print is right side up.

Time to press (iron):
Press the top edge, of skirt, down 1/4" then 1 1/4" more to form lines for casing.
Press bottom edge, of ruffle, up 1/4" and then 1/4" more to form lines for hem.
See our tutorial on hemming to make this go much quicker.

Time to sew:

Create Large Rectangles:
If you have more than one skirt rectangle, sew one set of short sides together (wrong sides together) to create one larger rectangle. Do the same for the ruffle.
Hem Ruffle:
Sew the hem of the ruffle.
Gather:
Set your machine to gather: large top tension number, large stitch number.
Sew a gathering (basting) stitch along the top edge of the ruffle.
Attach Ruffle and Skirt (in the flat):
Lay skirt right side up on a flat surface. Tape bottom edge down securely.
Lay ruffle wrong side up on top of the skirt, matching raw edges. Tape it down securely.
Pull up top gather thread until ruffle width matches skirt width. Pin if you want.
Sew ruffle to skirt with right sides together. Zigzag edges.
Sew Side Seam:
Open pressed edges up flat and line up side edges of skirt, with right sides together. Sew side seam to make a circle.
Make Casing for Elastic:
Fold pressed edge (top for casing) back in place.
Sew around the bottom edge of the top pressed area (wrong side) to form a casing for the elastic. Leave 1-2" opening near the back to insert the elastic.
Elastic:
Cut a piece of elastic: Waist – 2” = ______ elastic length
Thread elastic through casing. I put a safety pin in one end of the elastic and pin the other end to the skirt. Then pull the elastic through the casing. Fit the skirt to the wearer to check the elastic fit. Overlap the ends of the elastic and sew through 2-3 times. Tuck the elastic end into the casing and close the opening.

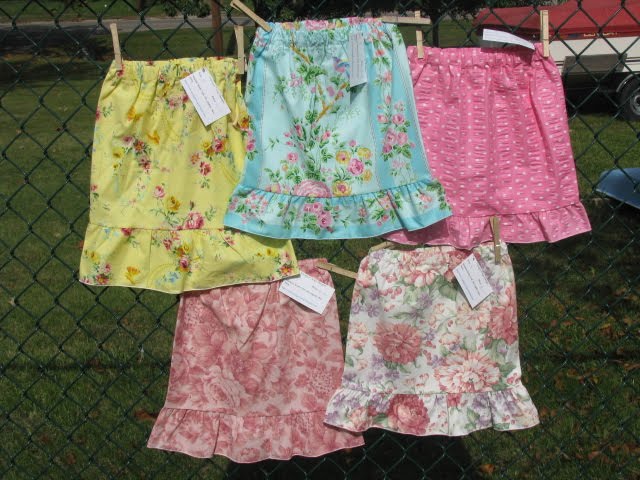
Your skirt is finished...Please Repeat and Share!
Happy Sewing!
Debbie

Thursday, March 17, 2011

The cutest lace skirt EVAR!

This tutorial looks complicated, so I don't recommend trying it unless you are Mrs. or Mr. Seamstress Extraordinare. But, I had to share the photo. It's such a cute skirt. Seriously.

The link to the tutorial is here: http://elleapparel.blogspot.com/2010/11/lace-for-days-skirt.html


Sunday, March 13, 2011

Creating Felted Flowers

I keep hearing "I felted this" and "I'm going to felt that" from different people. I keep seeing interesting purses and felted things at craft fairs. What is up with this "felting" movement?

I found an informative little felted flower tutorial I thought I'd share with all of you crafters out there...who may be wondering what the whole "felting fad" is about...and how can you get started? This tutorial may be the perfect way to start. You can buy the products at www.clover-usa.com:


More projects and items can be found at Clover Needlecraft's website: www.clover-usa.com

Wednesday, March 9, 2011

Stuffed Kitty Tutorial. Super duper cute!!!

I don't normally sew stuffed animals. I'm more of a fashion-type gal. ;-) But, I saw this super easy tutorial on Etsy and I thought I'd share for all of you kitty-lovers!

CLICK THE IMAGE TO ENLARGE AND READ IT:


Here's the pattern, as well:

Tuesday, March 8, 2011

Beautiful Felt Work!

I found this wonderful work by Lova Handmade. Her work is just so scrumptious!

;-)

Here's her blog: http://lovarevolutionary.blogspot.com/

Friday, March 4, 2011

We love barn wood, steel, rocks, stone, rust and trees - Sam's Welding

I found these guys on Etsy and I just loved their upbeat attitude and their fascination with using local items in their art. Recycling, using old techniques and keeping it minimal:
__________________________________


Melanie and Sam are the owners of Sam's Welding. They own a home business on 5 acres, with 2 children (now in college), horses, chickens cats and dogs.

They have always lived in the country and enjoyed using the natural raw materials around them in in the Pacific Northwest.

Melanie makes most of the finish work on items...sanding, clear coating, cleaning off the steel, filing etc. Sam started to work with wood turning in the last few years and also been learning more about the ancient technique of forging.

Sam has created many ornamental iron gates for people and garden sculptures for local people. Some pictures on their FB page can be found at: http://www.facebook.com/photo.php?fbid=173401839342326&set=pu.171773256171851&theater

They have 3 forges, one propane and two coal forges with manual blowers.

Melanie love rocks and stones so she's had fun this year splitting slate pieces by heating them and then taking the thin sheets and drilling out the slate jewelry pieces.

Between Sam and Melanie and the collections they have on their five acres and in their barns, they are always coming up with another idea to try. We love barn wood, steel, rocks, stone, rust and trees.

Tuesday, March 1, 2011

Fabric Flower Session - Craft Therapy

I'm in Tucson visiting my sister - who just had twins - and already has a 3 year old and 2 year old!!! Last night, after everyone was FINALLY asleep, she sat down and we had a little craft therapy together.

I'm so proud of her! Look at what a good job she did! Two button flowers, a rolled flower and a wool flower.

We were experimenting with a "scrunched" wool flower and it turned out pretty good.

Do any of you have any good re-purposed wool flower tutorials you can share with us???

My Blog List

Thank you for visiting our blog!

Visit our website for fun, girly fashion! http://www.paperandtwinecraftydesign.com